The importance of Re-use
Here’s a story that may sound familiar:
You downloaded Unity, watched some tutorials on YouTube, and had a physics “game” running the same day. Excited, you started writing the game you’ve always wanted to make. Possibly – bitten before when trying this with GameMaker etc – you thought to organize your source code: folders, subfolders, logically-named scripts, etc.
Fast-forward a few months, and you have 50 scripts in 40 sub-folders, some of it re-usable, some of it hardcoded for your game. Hoooo-Kayyyy… Well, it’s not too bad. And then a new opportunity comes along – a paid contract, a game-jam, a collaboration with a friend – and you want to re-use some code from your main project. You look at the folder structure, you look at how intertwined it’s all become … and you weep.
Without re-use, what seemed like an “easy” project becomes just a little too much work, and you never finish it. Back to square one :(.
Code re-use in Unity
There are five major aspects to code re-use when making Unity apps. Most of these are shared with general programming, but these are the ones I’ve found *especially* important when doing Unity development.
Good names
The best way to get good at naming things in a program is to focus on “what makes a bad name”, and “Don’t do that”. e.g.
- If you have to open a Script to remember what it does … it has the wrong name.
- If you keep typo’ing the script when referencing it in other scripts … it’s the wrong name
- If your script is more than a thousand lines long … it’s the wrong name AND you’ve put too much junk in there; split it!
- If you can’t find a script, because you can’t remember which folder it’s in … the folder name is wrong, AND the script name is wrong (should have been a name that forced you to put it in the right place first time!)
- …etc
Renaming scripts in Unity is a minor pain: you rename it, then you have to close the file in MonoDevelop, re-open it, and (assuming it was a C# class) rename the class in source-code too. (I keep hoping latest Unity will do this automatically, but I’m a version behind at the moment).
We need Sub-folders. Lots of Sub-Folders
… you can never have too many. Give them good names, though!
De-couple your code
Ah, now it gets tricky. The art of decoupling takes much practice to master.
Decoupling is why C# (and Java) has the “interface” keyword. The concept is much easier to understand after you cocked it up, written code you can’t re-use, because everything’s too inter-dependent.
“I can’t just copy/paste that script to my new project, because it references 3 other scripts. Each of which … references another 12. ARGH!”
Unity itself doesn’t use Interfaces (though it really ought to!) – and you have to use a little ingenuity to use them yourself (Google it, it’s only a few small caveats). But C#-interfaces simply give you a compiler-compatible way of decoupling: you have to design your classes as decoupled to start with. Again, google this and ask around – it’s too big a topic for me to do justice to here!
Package your code, so you can re-use it
Libraries. This is why The God Of Programming invented Libraries. So, how do you do a Library in Unity?
Libraries in Unity: the easy DLL
There are two kinds of DLL’s:
- Real DLL’s, as used by Real Men, who write all their code in C++
- Fake DLL’s, as used by the rest of us, who just want an easy life so we can focus on making our game
A DLL is a great way of packaging code – it’s a very widely-used standard. So, Unity uses DLL’s for this (good move) – but if you google “Unity make DLL” you’ll get distracted by the huge complexity and depth of C++/Unity integration, and you don’t need any of it. Instead, you’ll be doing “DLL light”, which is easy.
But, as with most Unity features, it’s almost entirely undocumented. And, out of the box, it will fail. For bonus points, Unity will give you completely the wrong error message when it goes wrong. Yay!
Step 1: write a Unity script in Unity
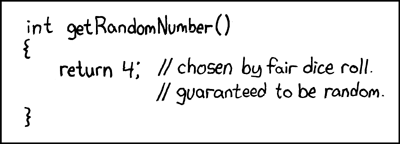
Do something simple. I wrote a class that makes random numbers, following XKCD’s advice:
[csharp]
using UnityEngine;
/** In Unity 3, you cannot have namespaces. So comment out this next line. Unity 4 is fine */
namespace MyTestDLL
{
public class DLLClass
{
public static int GetRandom()
{
return 4;
}
}
/** In Unity 3, you cannot have namespaces. So comment out this next line. Unity 4 is fine */
}
[/csharp]
Make a second script that uses that first one, e.g.
[csharp]
using UnityEngine;
public class TestScript : MonoBehaviour
{
void Start()
{
print( DLLClass.GetRandom() );
}
}
[/csharp]
…attach it to a GameObject, check it works.
Step 2: follow Unity’s docs on creating and using a DLL
You’d think this would be enough, but it isn’t. However, the docs are simple, direct, and I found them easy to follow.
So http://docs.unity3d.com/Documentation/Manual/UsingDLL.html = read this and do what it says
NB: they write a slightly more complex script to use than mine, with but whatever. The idea is the same.
Step 3: Use the namespace, Luke. And Interfaces. And …
Now that your DLL is compiling/building in MonoDevelop … you are no longer stuck with Unity’s arbitrary rules and restrictions! The world is yours!
(so, even in Unity 3, you can now use the namespace. Which makes it MUCH easier to keep your code well-organized ;))
Step 4: What about the [square brackets]?
These Just Work ™ exactly as they did in Unity scripts. e.g.
[csharp]
using UnityEngine;
namespace MyTestDLL
{
/** Hey! Look! Unity editor-features … coded outside of Unity */
[ExecuteInEditMode]
[System.Serializable]
public class DLLClass
{
…
[/csharp]
Step 5: Editor extensions, editor scripts, editor GUIs, etc
This is where it breaks. If you had any Editor scripts (which, in Unity, MUST be stored in the “Editor” root folder, or one of its subfolders), you can include them in your DLL – but they won’t work.
Worse, when you trigger them (e.g. by selecting a GameObject that did custom editor rendering), you’ll get:
Error: multi-object editing not supported !
…at least, you do in Unity 3.x. Fixed in 4.x, I suspect? But I haven’t gone back to try it since I fixed the bug :).
There is some mumbo-jumbo on the internet (and Unity forums) about complicated workarounds, notably courtesy of AngryAnt (with a Jan 2014 post here, with some extra info worth reading but NOT required!). But these are long-since outdated and unnecessary. The fix is very simple: we must create TWO DLL’s!
- DLL #1: the one we already had
- DLL #2: will contain ONLY the editor-scripts, and we’ll drag/drop it into Unity’s “Editor” folder.
This is extremely logical, simple, and easy to remember. And it works beautifully! But .. how?
Step 5a: Upgrade MonoDevelop project to output not one, but two, DLL’s
First, right-click on the top-most item in MonoDevelop’s “Solution” panel, and select “Add New Project…”:

As you did earlier, choose “Library (C#)”. I recommend naming this “SomethingSomethingEditorScripts” (where “SomethingSomething” is your library name, which you used for the first DLL).
Second, you need to edit the References (as you did with first DLL), and this time repeat the steps and add ALL of:
- UnityEngine.dll
- UnityEditor.dll
- …
- AND: instead of the “.Net Assembly” tab, use the “Projects” tab and select your main DLL/library. It should be the only option
That gives you something like this:

…see how I have two “projects” in MonoDevelop, one which just uses normal Unity stuff, the other which additionally uses Unity Editor stuff? And the second one “references” the first, so it can see/use/create the classes and methods from the first one.
Step 5b: Put the DLL’s in different places
Build, and find the output files. The first project/DLL will still only be making one DLL, but the folder for the SECOND project/DLL will conveniently build BOTH projects and contain BOTH DLL’s.
Make sure you put one DLL “anywhere except Editor” and the other one “in Editor, or a subfolder of Editor”.
Finally, create some GameObject’s, open up the DLL’s in Unity’s Project view (expand the triangle) and drag/drop the Scripts onto your objects as desired. Click on them in the Scene view, and all your OnGUI, OnGizmos etc methods should run exactly as normal.
Step 6: Rejoice!
Now you can share your code with other Unity projects simply by drag/dropping the 2 x DLL’s into a new Unity project. BOOM!
Beautiful! Easy, simple, impossible-to-screw-up ;). That’s how I like my code re-use…
6 replies on “How to tidy your Unity code by putting it in a DLL”
Good guide!
We do something similar, but instead of wrapping plugin code into libraries, we wrap it in mercurial sub-repositories that can be checked out to the Plugins and Editor folders of your projects. With this you have the advantage of choosing exactly which branch and version of your library code to using in your project, and the bookkeeping required is not much more than setting up library projects. Also, SourceTree notifies you of new available versions which you can get at the click of a button, instead of manually copying DLLs.
I think it’s best to have a separate repository for your library code, and when you update the library, you generate a new DLL that you drag/drop into your current project.
This is much, much safer than direct-embedding source code that is edited from multiple places. It is also MUCH easier for people coming to the project to pick-up-and-use: all the dependencies are already done for them (don’t even need to build anything). This is important in the long term, especially if/when e.g. MonoDevelop gets an upgrade and stops being able to compile old DLL’s the way it used to (at which point: with your approach, your old builds no longer build!).
Also, in my experience: you don’t want it to be too easy to switch to “new versions”. It seems a good idea, but sooner or later, someone on the team – usually the least experienced person – goes “OK”, and corrupts the project. They don’t realise that they have to check EVERY SINGLE SCRIPT in the entire project before OK’ing / committing this update! It shouldn’t happen, but it does ;)
But
The idea of building scripts in a reusable library is good.
The major pain in the a^^ is that you have to copy the .dll outputs on every code change/build you make to your unity project. I guess this can also be solved in multiple ways.
@lior
Any suggestions? I flirted with building directly into unity folder (very bad idea ;)), and with symlinking a hard link (should work fine on OS X, but I’m not sure how well you can do that with Windows 7/8).
My todo list: see what support MonoDevelop has for adding custom “post build” hooks, so I could add a copy phase. But again, I’d have to keep enabling/disabling individual projects – or risk overwriting a version in a project Im not currently working on, potentially breaking that project :(.
You can use namespaces in external DLLs in Unity 3.5.7 – we do it, with our protobuf dlls, and other stuff.
Not having real namespace support in Unity really shows the quality of Unity coding off, don’t you think? :)
Thanks for the feedback on this, Adam. I’ll keep that in mind next time we make any changes to our workflow. :)